PluralEyes – Syncing audio does not have to be stressful. Should you take DSLR, Mirrorless, or onto any camera that does not provide high-quality in-camera recording alternatives, you are aware of how much time it may choose to sync your movie along with the recorded sound.
Streamline your audio sync workflow at Premiere Pro with PluralEyes.
PluralEyes will be a quality third-party plugin out of Red Giant that simplifies this undertaking. When there are lots of workarounds, for people who have left the investment and therefore are to streamline, below are a few strategies for optimizing your PluralEyes workflow in Premiere Pro. Click here to download PluralEyes.
If you are thinking, you can find a free course of PluralEyes in their site prior to purchasing the app.
There’s a brand new FREE upgrade to PluralEyes 4 is still filled with new features Such as:
- EDIUS Pro assistance — Consumers can begin a job in PluralEyes 4.1 and export the synced endeavor to an FCP 7 XML document which may be imported into EDIUS Pro 7.5 or 2. NOTE: video websites must have the Exact Same frame rate; combined frame speeds projects aren’t supported from the EDIUS XML import.
- Music Video Workflow — A very common way to shoot music videos would be to get talent acting together with exactly the exact identical background sound (music track) in several shoots or perhaps in numerous places. Throughout the A/V sync, the PluralEyes can combine takes in their own monitor, muting all music however the master monitor.
- Service GoPro Spanning Media — To be able to conquer file size limitations, a few cameras encourage a more recording period by recording multiple documents as well as several cameras cards. PluralEyes can discover that, and combine spanned clips into one clip, which makes working with the document a lot simpler. New to the most recent edition of PluralEyes is defying service for GoPro Cameras.
- Delete many clips together — In version 4.1, now you can select a number of clips and then delete them collectively, which makes it simpler to clean up a synced endeavor in PluralEyes 4.1 prior to exporting into an NLE.
- Ability to flip off drift-correction — Past variants of PluralEyes 4 constantly correct audio ramble when sound drift reaches a particular threshold. This may lead to more sync occasions for bigger projects with sound ramble that some may consider the minimum. Currently, a user may turn off drift-correction from unchecking the”Correct Audio Drift” sync choice beneath the Sync menu thing.
BUG FIXES PluralEyes 4.1 also has the next bug Repairs:
- Addressed connectivity problems using all the PluralEyes 4 board for Premiere Pro which could create”Unable to speak with PluralEyes” or even”Lost link to PluralEyes” mistakes.
- Resolved hangs that will happen when employing the PluralEyes board for Premiere Pro through the”Sending networking to PluralEyes”
Step One: Insert Your Footage into Premiere Pro
Upload your Footage on your pc. For suggestions about the best way best to arrange, the following is a fantastic post.
When you’ve your footage in which you wish to utilize it, then open Premiere Pro because you normally want your perfect sequence configurations.
Also, check – Top Best jailbreak iOS 13 – iOS 13.4.1 Tweaks (Cydia – Unc0ver – Checkra1n Jailbreak)
Step Two: Create a Timeline and LayOut All Of Gear and Audio
Create your own sequence, and then drag all of your footage and sound on the deadline. Make sure you arrange each (if you are using a number of cameras) on their own degree. Put the sound at the bottommost degree. Be certain all of the footage is back to the rear.
Step Three: Open PluralEyes at Premiere Pro
To start PluralEyes, proceed Into Window -> Extensions – > > PluralEyes, also PluralEyes will establish a smaller window at Premiere Pro to your sync. In case you have multiple timelines available, it is going to request that you pick which one you’d love to utilize, therefore ensure that you name your timelines suitably.
Step Four: Synchronize and Export
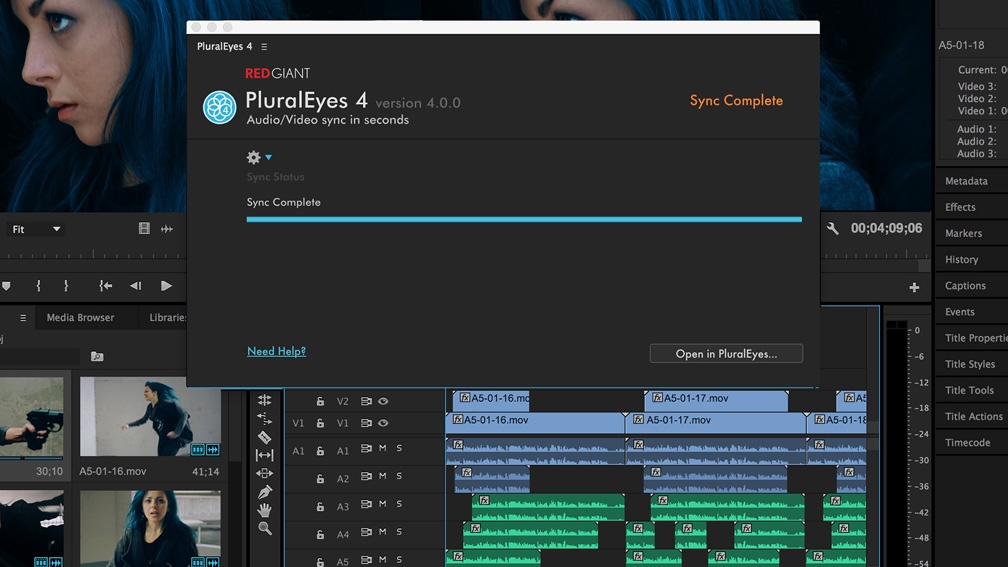
One you need PluralEyes open, so you’ll see your footage And sound files appear since PluralEyes scans them. You will want to wait till they’re all scanned until you may sync (however you are still able to go right on and click sync immediately ). As soon as they’re scanned and you have clicked, you are going to see as they organize to fit. After that, click export, along with also a fresh synced timeline will soon likely probably available in Premiere Pro to you personally.
From the PluralEyes choices, you Can Opt to have your own footage, And sound only matched beside one another or even to substitute And join the external sound with your movie.